11 Jun Craft Tutorial: Pretty Peg Magnets
Project; make your own peg magnets using vintage children’s books
Tutorial time: 15-20 minutes
Difficulty level: Easy
Cost: Cheap and cheerful
Age Level: adaptable for different ages. Younger children can use scissors instead of craft knife. The results won’t be as finished but the kids will be really proud that they’ve done it all themselves.
Materials
Timber Pegs
Craft Knife (or scissors)
sharp pencil
PVA glue and a brush
Old Children’s books with illustrations
Ruler
piece of card
Magnetic Flex Tape (optional)
Step 1:
Choose the pegs you are going to use for the project. You can normally find packs of timber pegs in 99c stores or your local hardware store. It’s worth spending a bit more on the pegs to make sure you get good quality pegs that aren’t too skinny.
Next you need to make your ‘template. I have uploaded a sample template here but the template size will depend on your peg size.
To make your own, grab a peg and a piece of sturdy card (use an old cereal box)
Lay the peg down and trace around, make sure to mark where the gap is between A and B (you can see this on the template)
Using a ruler draw lines de-marking the top (A) and bottom (B) sections of your peg. (so that you have straight lines to cut along)

Carefully cut out parts A and b using a craft knife. (if you are doing this project with young children have this part pre done. You only need to cut out one ‘peg’ space. (see above I have cut out one at the beginning and one at the end so I can see where my design begins and ends)
Step 2:
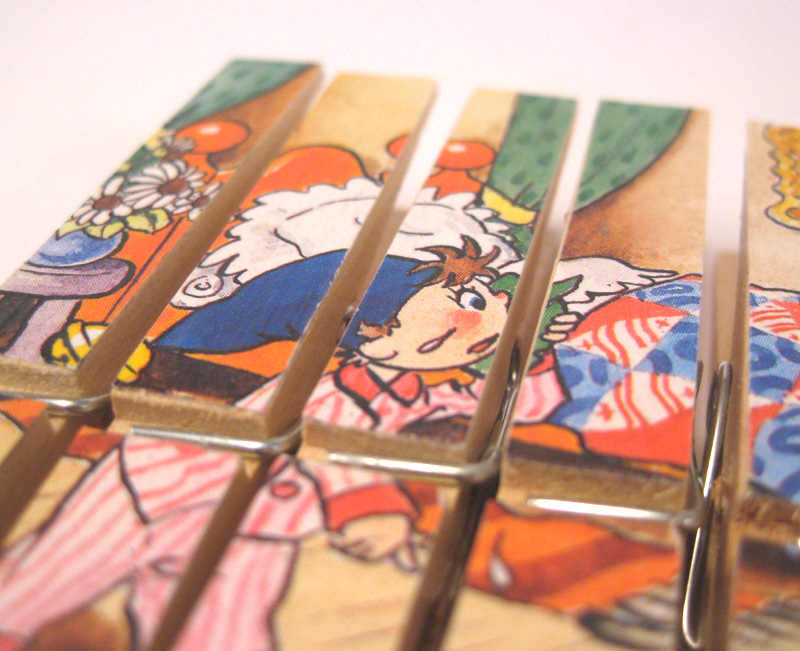
Pick the material you want to cover the pegs with. I chose colourful illustrations from an old Noddy book that was falling apart.

Lay your template over your selected page so you can see what will be on your peg.
Adults Using your craft knife carefully cut out each part of your peg.
Children using a sharp pencil (not a marker as you want to be able to erase any stray lines) mark out the two parts of your peg. Cut out with a scissors.


One down … 5 to go
Continue until you have enough for all the pegs you want to cover. I did a set of 7 which was determined by the illustration I was using

Step 3:
When you have cut out all your peg sections its time to glue them on. Using a small brush and some PVA glue brush the glue onto the timber part of the peg. Stick the paper to it and let dry. ND Make sure you don’t mix up your tops and bottoms as you want your picture to line up.

At this point you can leave them as they are OR if you want you can turn them into magnets.
Step 4:
I bought my Magnetic Tape here
Cut small pieces and stick to the back of your magnets. One piece at the top, one at the bottom.

Step 5:
To seal your pegs lightly brush over the surface with PVA glue that has been slightly diluted with water. Practise on a scrap bit of paper and let dry before you work on the pegs.
And that my friends is that. 5 easy steps to a beautiful handmade creation. Perfect to give as gifts, use with your Christmas decorating or wrapping presents. Use them to hold your shopping lists or just to make things pretty.


Sorry, the comment form is closed at this time.